Monetize Pictures In Your Blog With BritePic
If you happens to think out of the box of ways to monetize a blog or website, many can mostly list PPC ads, affiliate links cloaked and coated in your content or a landing page grabbing email for further leads. How many of you actually think that besides RSS and contextual ads that make money, images that you embed in your post too can make money?
Adbrite has offered this ingenious feature called BritePic , a monetizing service where you can squeeze out easy money just from putting up an image, of course with significant traffic just like any average PPC ads. If you are an owner of a gallery or portfolio sites with steady streams of traffics that displays a lot of image, this program might be the one for you.
What is cool about BritePic is, they are almost unintrusive at all. You can serve images without being bothered about some annoying effects popping out of your image disrupting your viewer’s experience. In some ways, BritePic does spice up your images on your website to be more interactive.
You can have the images accompanied by Adbrite ads as well or you can just disable it. If you are the one that wish to explore the features to the maximum, you can enable it from the menu option. The images can be zoomed and forwarded to people via email. It can also be shared by embedding it to other sites. If blog posts can go viral, BritePic pave the way of making images to go viral as well.
Currently BritePic offers the following features to the images on your website:
- AdBrite ads
- Email this image
- Link to this image
- RSS subscribe
- Captions slide out
- Link the image to another URL
- Embed this image
- Zoom in and out
How it Works
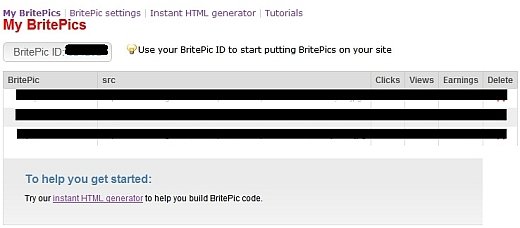
BritePic uses Javascript technology to spice up your images for monetization. When signing up in BritePic.com, it will actually divert you to Adbrite.com, and it sits in the Adbrite.com’s dashboard. Signup for BritePic first and you’ll be presented with an Adbrite dashboard. Your BritePic sits on the far shown by the image below;
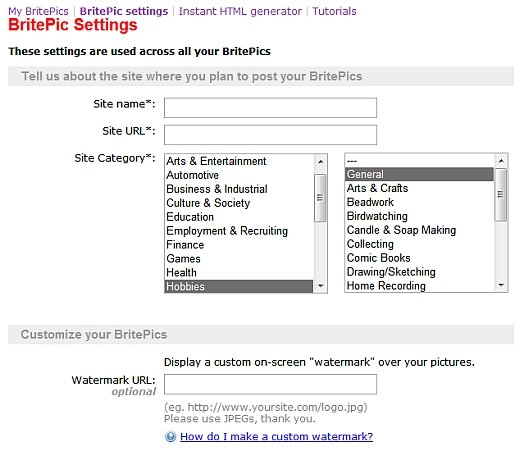
Before anything, you must configure what category is best to describe your site. As usual, site name and URL with the best category. You had the choice to watermark and sprinkle keywords that best describe your website/blog. Also you can enable ‘Show Ads’ or otherwise.
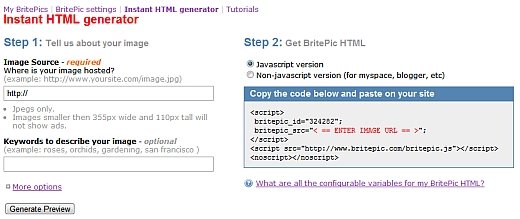
First, you got to source out the link of your image whether it is locally hosted or externally hosted i.e. Photobucket, Imageshack etc. Upload as usual (if locally hosted) or grab the link (if externally hosted) and paste them in Image Source. Sprinkle some keywords in ‘Keyword to describe your image’ that best describe your image. You can further configure the appearance of ads by activating the ‘Show ads in picture’ to ‘Yes’. For extra features, you can enable ‘Show the BritePic menu in this picture’. Copy the Javascript, and paste them in your blog post.
Here is the example of what it looks. As you can see from the pic below, a menu is generated on the bottom left for extra features like email sharing, zooming etc. The image name will appear at the middle-right.

The only downside about doing this is the time wasted in copy and pasting. If you had a page with large amount of picture, the process can be tad tedious. Also too many Javascript hogs the load time and bandwidth. I would encourage using it sparingly on minimal image pages with high quality blog content. This will engage viewers further by giving them the urge to click and interact with the content.
BritePic is undisputed a pioneer in image monetizing and this product is really clever as it utilizes pretty smart technology coating Javascript around the image and track clicks. Fans of Adbrite might find this an extra boost in their income as BritePic complements your existing Adbrite utilization.
